Shirt dresses are so convenient and practical, taking you from everyday wear to a romantic evening outfit. What I find the most exciting about the shirt dress is that is fantastic option for returning to work while still breast-feeding. Think off the nursery pick up where all the baby wants is a quick access to the boob. In a shirt dress you do not need to undress in public to serve the baby, just undo some buttons and voila, everyone is happy. The same applies when you need to express the milk while in the office and still want to look glamorous.
Learning how to draft a shirt dress pattern gives you complete control over the fit, length, silhouette and design details of your garment.
In this blog post, I will show you how to draft a shirt pattern that works for any occasion. I will be making a once-piece shirt dress pattern but I will address a two part option in a future post.
This shirt dress pattern drafting tutorial works for both self-drafted bodice blocks and commercial sewing patterns.
The shirt dress pattern will be based on the pattern created in how to draft a close fitting bodice block, however you can use any bodice block that you already have, that fits you well, either a self drafted pattern or a commercial sewing pattern.
What This Tutorial Will Teach You
This tutorial shows you exactly how to draft a shirt dress pattern from scratch using a bodice block or a fitted sewing pattern. ou will learn how to draft the front and back dress pattern, add a button stand, shape the hip area, draft sleeves and create a collar for your shirt dress. The same approach works whether you are using drafting the entire shirt dress pattern or modifying a commercial pattern.
Process Overview of Making a Shirt Dress Pattern
A shirt dress sewing pattern combines classic shirt construction with the shaping and length of a dress. Breaking the drafting process into smaller steps makes the pattern much easier to draft accurately.
The process for making a shirt dress pattern follows these main steps:
- Tracing bodice block
- Extending waist to hemline
- Adding waist – hip darts
- Adding button stand
- Drafting a collar pattern and collar stand pattern
- Drafting a sleeve pattern
- Drafting a sleeve placket (optional)
- Drafting a sleeve cuff pattern (optional)
I will address each step in the blog, adding insight from my experience as well as options for variations to make it unique to you.
Tools and Materials You Need to Draft a Shirt Dress
To draft a shirt dress accurately you only need a few basic pattern drafting tools. You can read more about each tool in my post on the essential pattern drafting tools.
- a list of your body measurements (my post on how to take accurate body measurements include a free tool and a guide). You will need measurements for your hip and mid hip circumference as well as the waist to mid hip, to hip and to the required hem location.
- pattern paper
- grading ruler
- long ruler
- protractor
- pen or pencil
- French curve
- pencil eraser
- basic bodice block, but you can use any bodice part from the commercial sewing pattern that fits you well but remove the seam allowance first.
- sleeve block pattern, if you are using a commercial sewing pattern that does not have a sleeve pattern, follow the instructions on how draft a basic sleeve pattern.
Having accurate body measurements is one of the most important parts of successful pattern drafting because even small inaccuracies affect the final fit of the shirt dress.
Understanding Shirt Dress Anatomy Before Drafting
The shirt dress consists of a one-piece front block with button stand extension, a collar and collar stand and sleeves. A classic shirt sleeve includes a sleeve placket and a cuff, however for a more summary option the dress can be made with a short sleeve variation or with a sleeve with an elasticated wrist. Optionally, the shirt dress also includes a waist tie or belt. Understanding the components of the shirt dress pattern will keep you on track when drafting your own shirt dress sewing pattern.
Knowledge of how each component works together also makes it easier to customise your shirt dress with different collars, sleeves, cuffs and silhouettes.
Step by Step of Drafting a Shirt Dress
The process of the drafting the Shirt dress starts by tracing the bodice blocks, extending the blocks to the desired hemline, drafting a matching collar stand and a collar and drafting or modifying a sleeve pattern.
Step 1: Tracing Front Bodice Block for a Shirt Dress
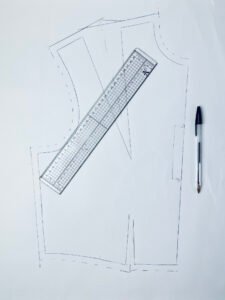
We start by tracing the front of the close fitting bodice block on the pattern paper. Here you need to make a decision on the dart location and width. In my bodice block modification for a shirt pattern tutorial I only used one bust dart, eliminating the waist dart completely. However, for a shirt dress I am actually adding a waist dart. If your tummy sticks out a lot, then eliminating a waist dart at the front will make the dress fit slightly nicer, without bringing an attention to the rounded belly.
As my front bodice block is naturally split in half at the bust point, I can move the dart location around quite freely. For this shirt dress pattern, I choose to close the shoulder dart and add a bust dart staring at 5 cm (2″) below the armhole.
The location here is not as important and you can locate the dart anywhere in the side seam. I would not recommend adding a bust dart starting in a armscye if you are a beginner because it is a little harder to add seam allowances later on. In a future post I will explain the dart manipulation in detail.
Before you get into tracing, make sure that you leave enough space on the paper at the centre front line to add a button stand extension in step 3.
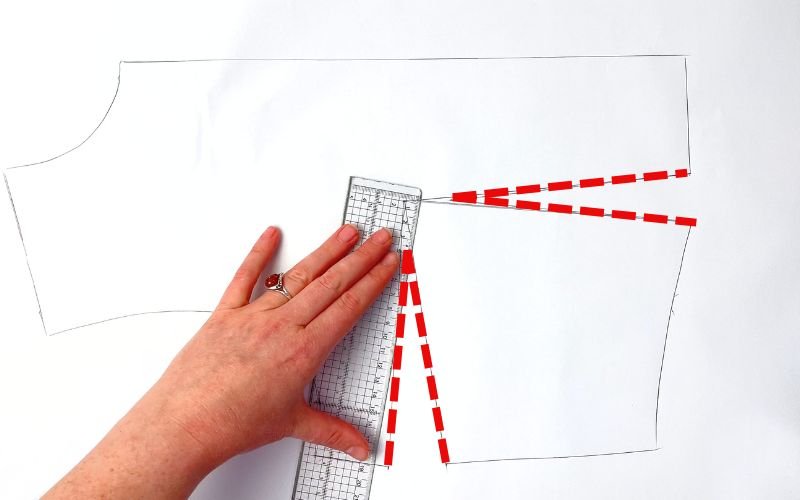
Trace the joined pattern starting at the mark for the bust dart, going clockwise up to the first side of the waist dart and up to the location of the bust point. Mark the location of the bust point accurately. You may need to lift the side front of the bodice block to make a precise mark.
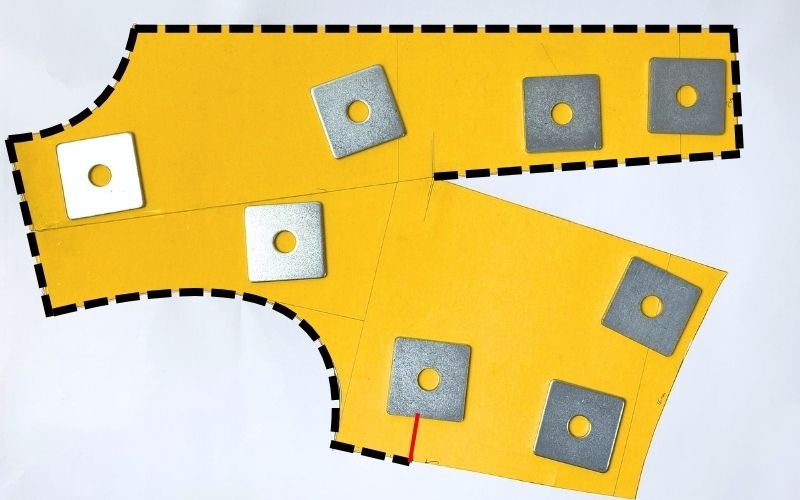
Then, pivot the side part of the front bodice block to create a waist dart width that you prefer. Again, the actual width is not as important but I like to keep mine somewhere between 2 to 3 cm wide (around 1″).
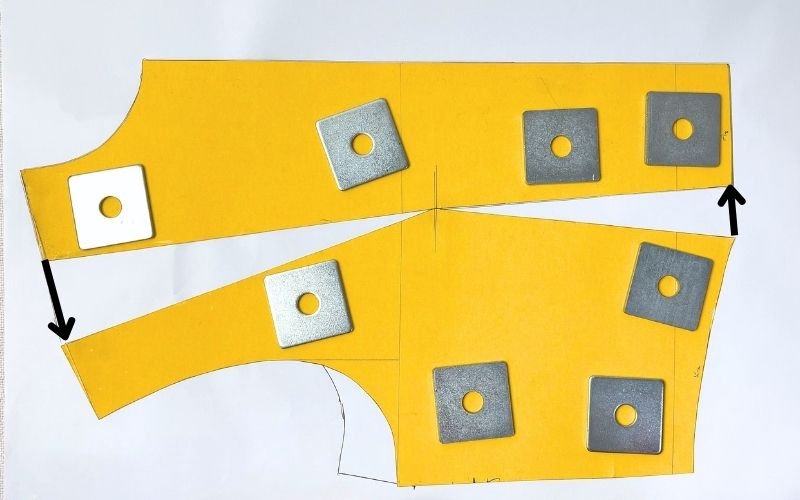
Continue tracing from the bust point to the mark for the bust dart location on a side seam.
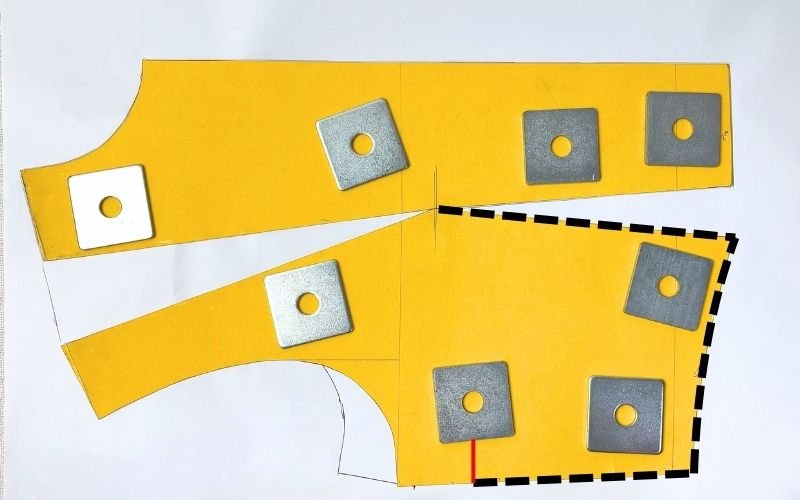
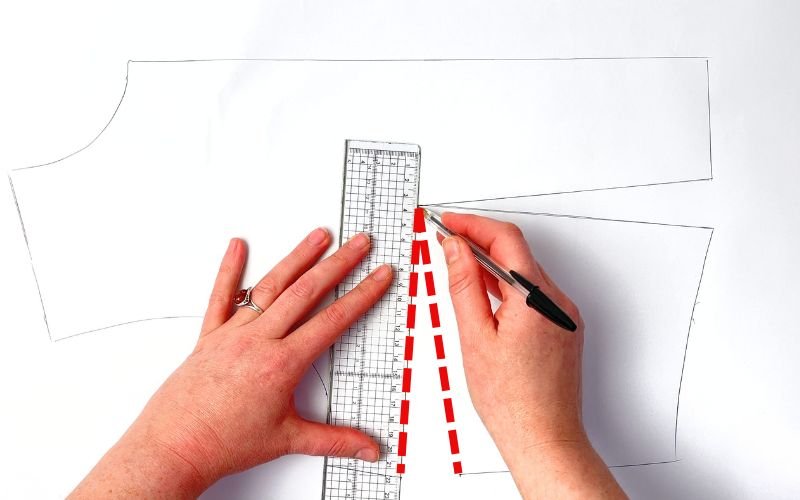
Connect the side bust dart points with the bust point. Then reposition the dart point to be around 2-3 cm (1″) away from the actual bust point and reconnect. This will eliminate any unwanted sharp points at the bust apex.
Step 2: Drafting the Front Pattern for a Shirt Dress
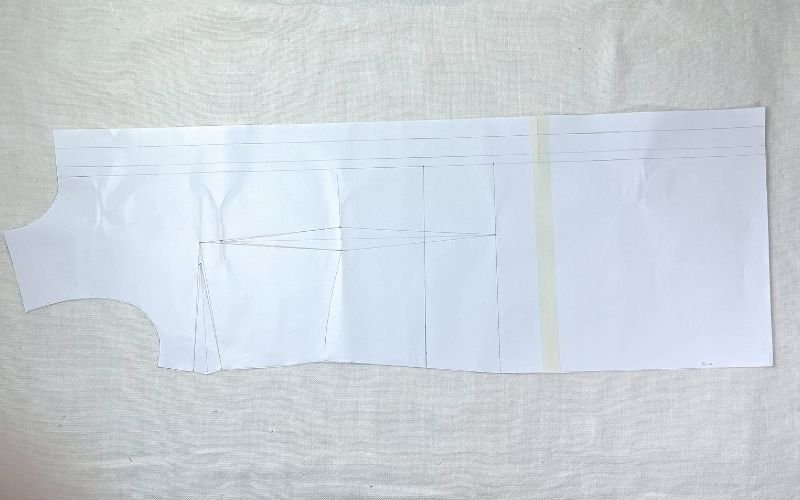
Once the front bodice block is traced, you are now ready to extend the front bodice to the hemline. I prefer my hemline to be anywhere between mid knee and mid calf, and for this tutorial I have chosen a knee length shirt dress variation.
First, extend the centre front line from waist to the required length. For me, that’s 60 cm (25″) below the waist. Square across.
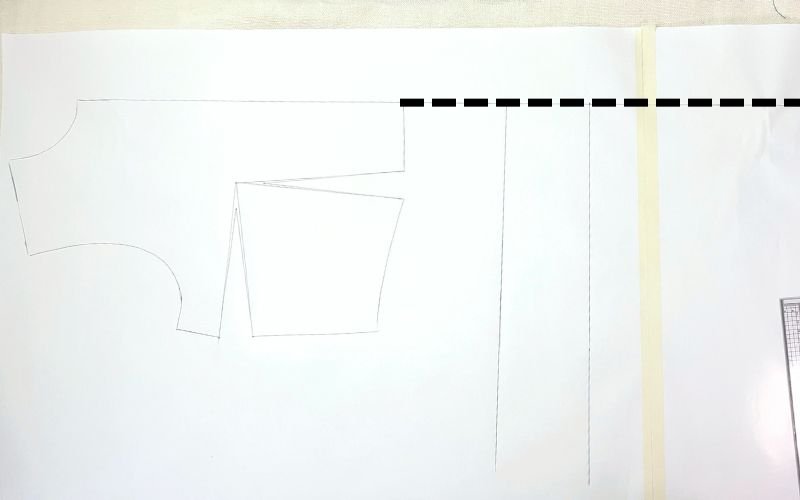
Mark the location of the mid hip and hip, measuring from the waistline. Square out to the left from both locations.
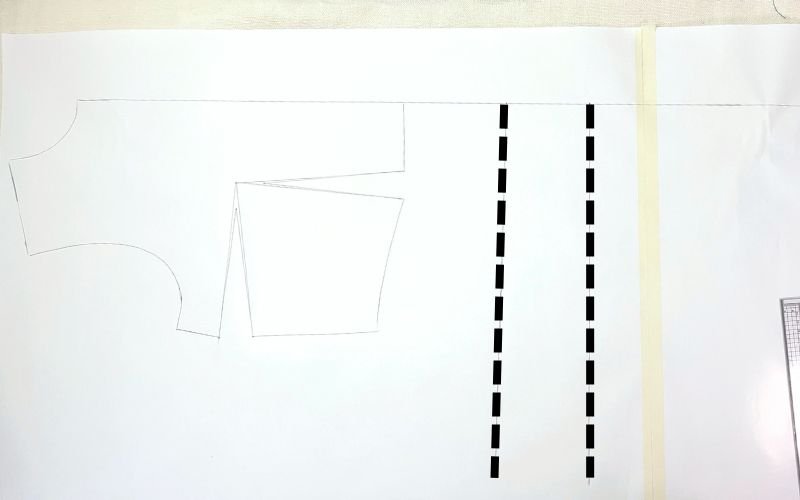
Next, we need to locate the width for the mid hip and hip. To do that, you need to know the total wearing ease your bodice block has and the circumference measurements for the hip and mid hip. If you created a bodice block following my close fitting bodice block tutorial, then the waring ease there was 6 cm (2 3/8″). If you are using a commercial sewing pattern, check the completed garment waist measurement on the pattern card and compare to your actual waist measurement. The difference is the wearing ease to use for the hip area. If it is small than 5 cm (2″), you can increase it to ensure that the dress allows you to move freely without putting too much strain on the buttons.
Your mid hip measurement formula is (your mid hip circumference + wearing ease) / 4.
And the hip measurement formula is (your hip circumference + wearing ease) / 4
Mark both the hip and mid hip widths locations on their respective lines.
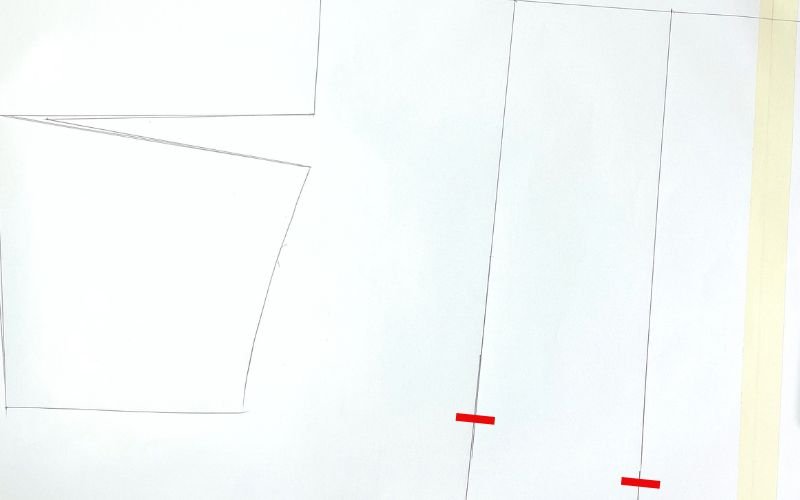
Extend the waist dart, by connecting the bust pint with the dart mid point and extending all the way to the hip line.
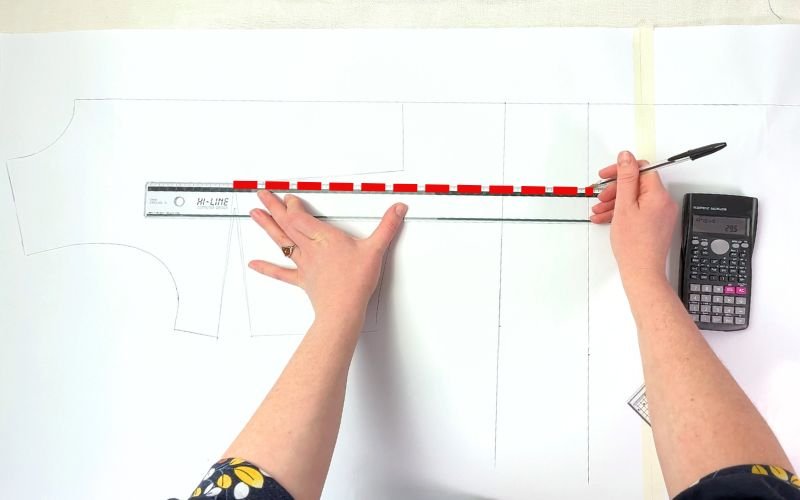
Then form a waist to hip dart by connecting the dart tip at the hip with the dart legs at the waist.
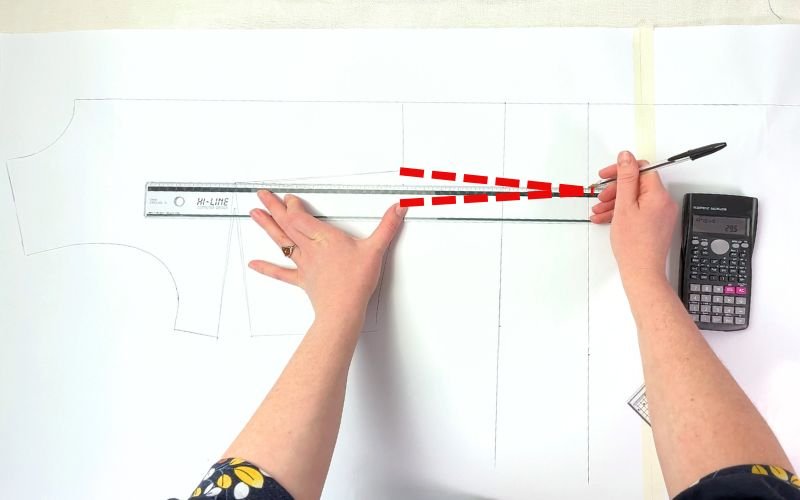
As there is a dart added, you need to move the mid hip location by the dart width at the mid hip to the side seam.
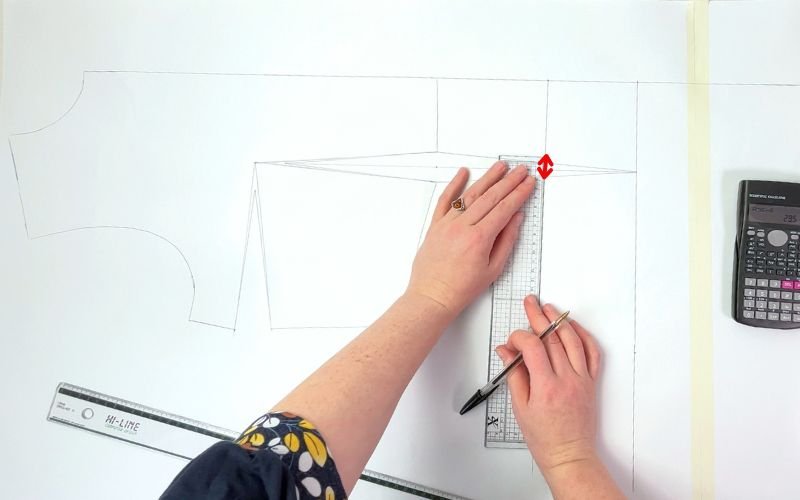
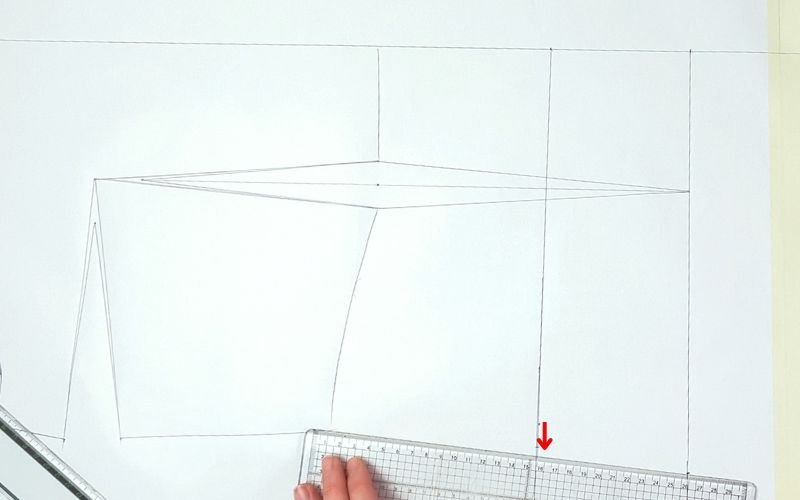
The mid hip location in most cases will not form the garment construction but it is a useful guide to see whether the point falls within the shirt dress pattern. If the point falls outside the side seam, then you will need to use the mid hip location as a the hip circumference measurement, by squaring down from the mid hip to hemline and connecting it with the waist.
Next, connect the waist mark with a hip width mark with a straight line.
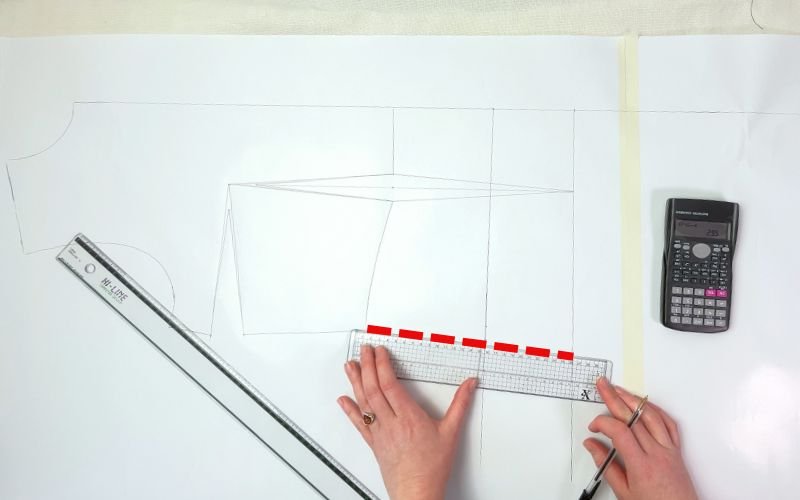
Then, connect the hip to the hem with a straight line.
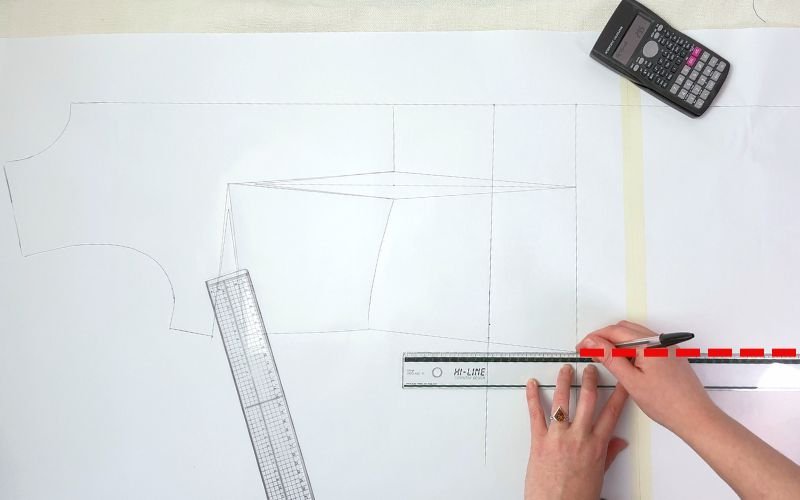
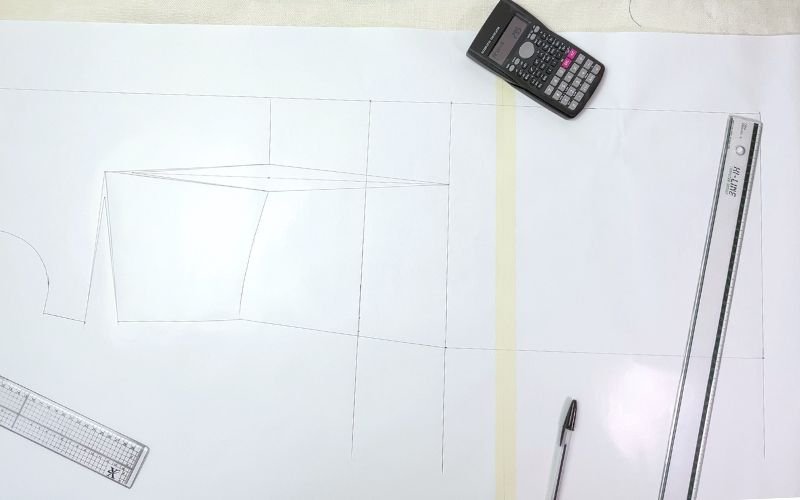
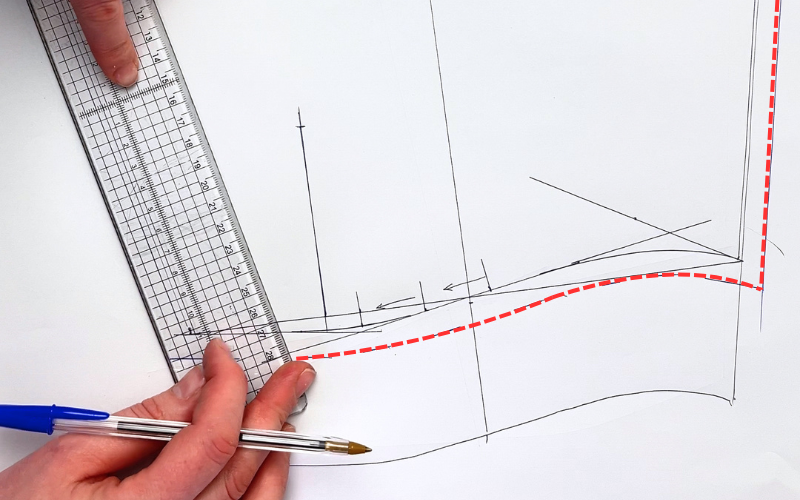
Smooth out the curve from hip to waist with a French curve to complete the side seam.
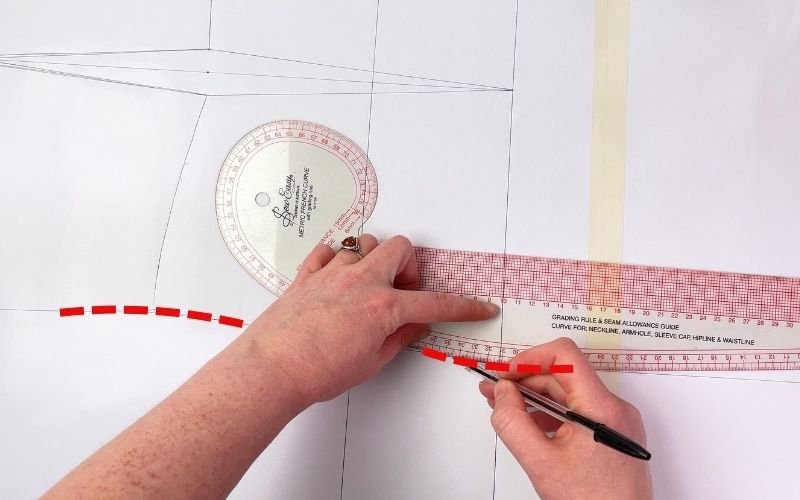
Step 3: Adding Button Stand Extension
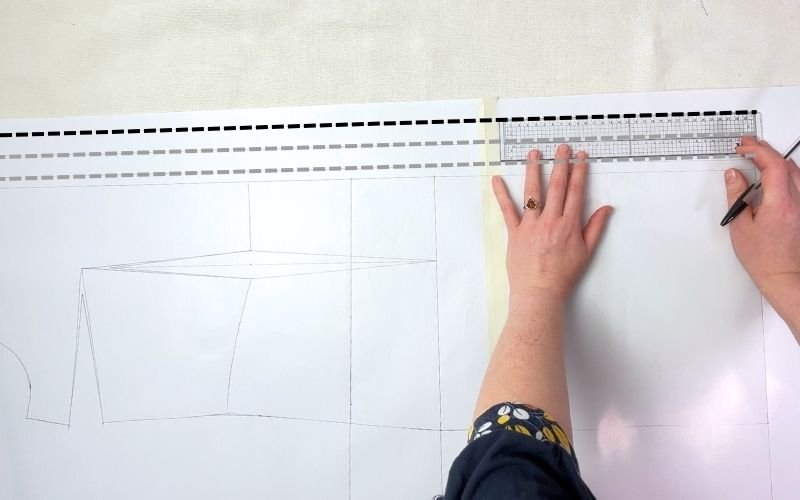
Once the base for the front pattern has been completed, you need to add button stand extension. This follows a basic of 2.5 – the button stand extension should be the width that is 2.5 wider than your chosen finished button stand width. Follow my detailed button stand drafting tutorial to calculate the correct extension width and create professional shirt openings.
Step 4: Drafting Back Pattern for Shirt Dress Pattern
You will be pleased to know that the back pattern is easier to draft because it replicates the same steps you did for the front pattern, with the exception that you do not need to move the bust dart.
Trace the back bodice pattern.
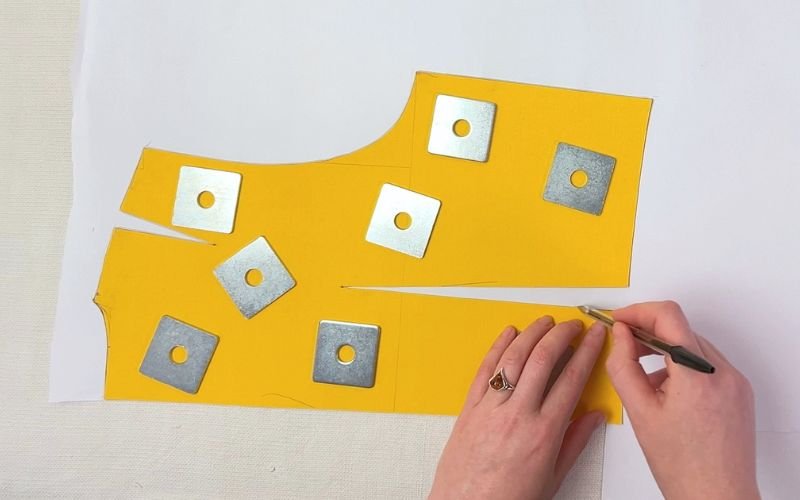
Extend the centre back line to the hem.
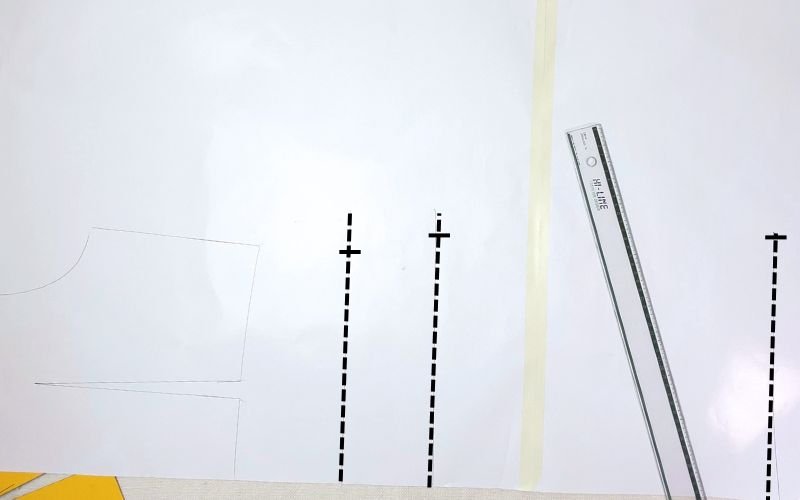
Locate the mid hip and hip location and square to the future side seam.
Mark the mid hip and hip width location on these lines, using the same measurements from the front pattern.
Extend the waist dart to the mid hip location, to form the waist to hip dart the same way as you did on the front pattern.
Relocate the mid hip width by the dart width measurement.
Connect waist with hip with a straight line, and square down to the hem from the hip. Smooth the waist to hip with a French curve.
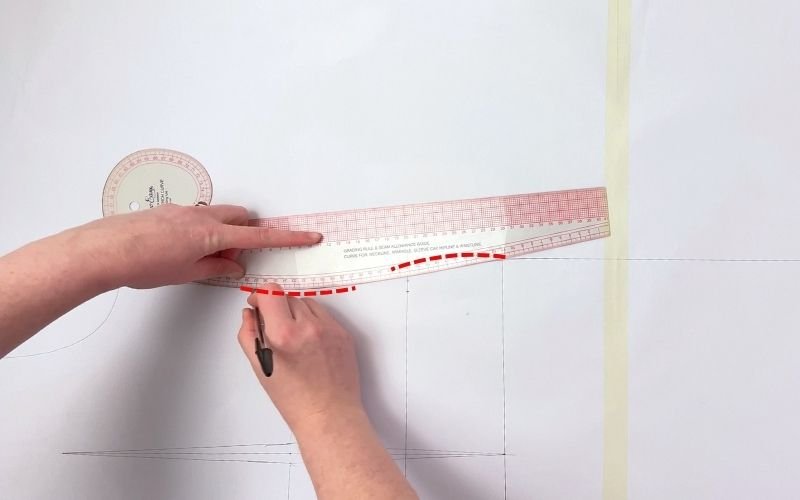
Check the location of the mid hip in relation to the side seam. If it is outside the pattern, use the mid hip circumference measurement for the hip width.
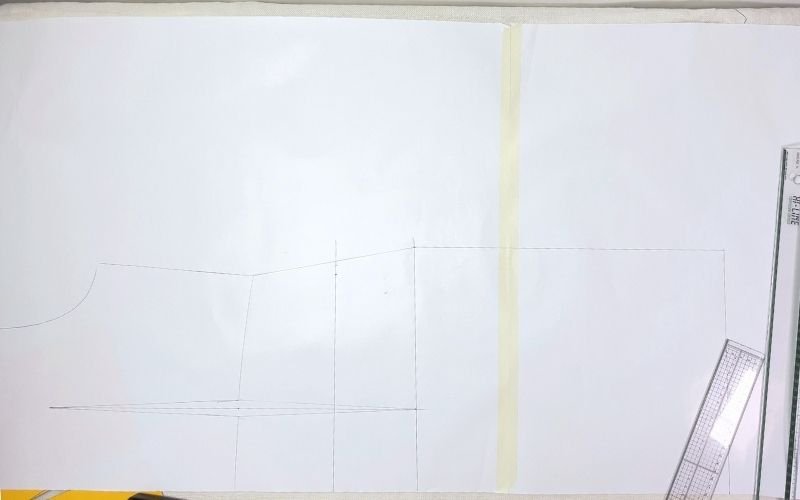
Step 5: Walking The Side Seams
Now, if you refer to my bodice block post, you will not that the centre front waistline is actually lower than the centre back waistline, to accommodate the natural curves of the body (the boobs!). Because of that, the side seams most likely are no longer the same length and you need to adjust that by either lowering hemline on the back pattern, or by raising the hem on the front pattern.
To do that, you have to options. The first one, is to place the cut out front pattern on top of the back pattern, matching at the waistline. Then align the side seam until the seams go opposite directions. At that point, pivot the front pattern to match up the side seams again. I explain this method in more detail in my post on how to modify bodice block for a shirt pattern.
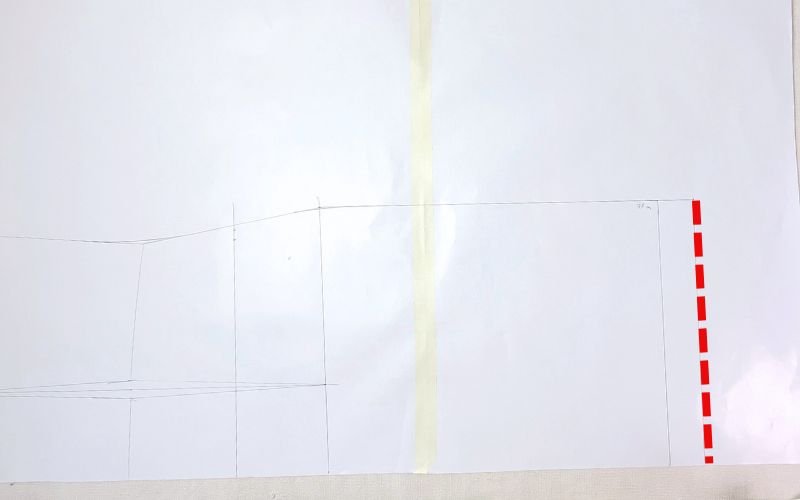
The other method is much simpler on a long side seam like the shirt dress. Measure length of the side seam on one of the patterns and compare it to the other. Then adjust the patterns accordingly, also marking the new hip location as that will be out too.
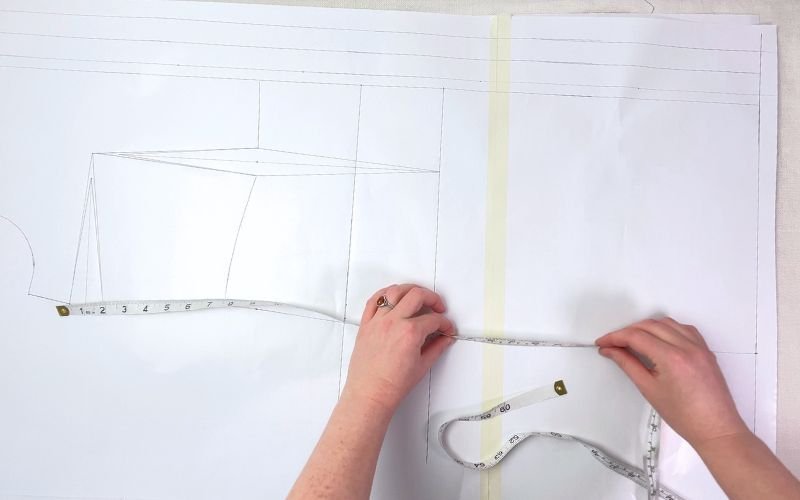
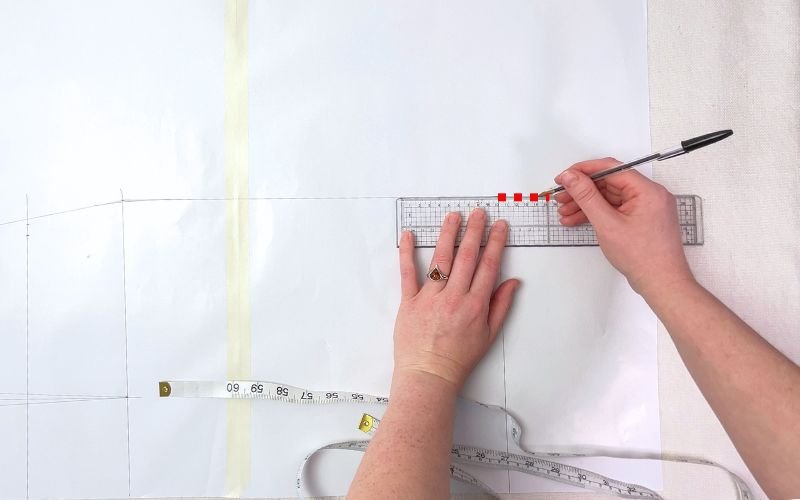
The difference in the side seam length also comes from sway back posture. I have battled with it for all my pattern drafting journey and I usually opt for two-piece dress patterns as that eliminates this variance. I will be addressing the sway back modificaations and the two-part dress patterns in my future posts.
Step 6: Drafting a Shirt Collar and Collar Stand
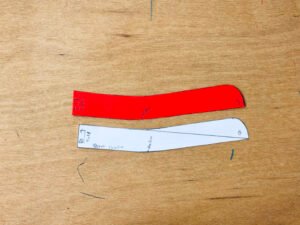
A classic shirt dress will need a classic shirt collar stand and collar. I have separate posts on how to draft a collar stand and how to draft a collar patterns to create a complete shirt collar pattern that sits smoothly against the neckline and does not collapse or gap. So here, instead of repeating myself, I will highlight possible alternative option for even quicker collar pattern.
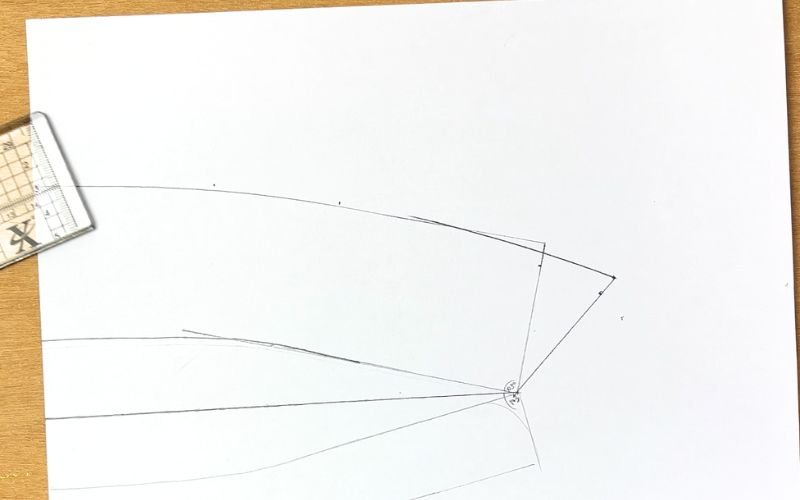
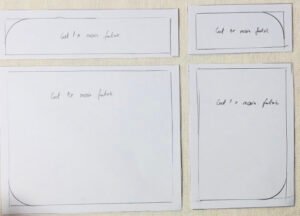
A quick and basic collar is a basic rectangle that is the length of the neck circumference on the shirt dress (with or without the button stand extension and definitely without seam allowance), and your preferred width. I would recommend at least 5 cm (2″) width. If you are including the button stand extension, you will not be able to add button at the neck because this collar will overlap. However, if you are creating the basic collar without the button stand extension, you will need to replace the full button stand extension with a half the finished button stand extension and a facing, to cover the raw edge at the neckline.
Step 7: Drafting a Sleeve Pattern
Using the basic sleeve block or a commercial sleeve pattern with seam allowances removed, either create a full shirt sleeve pattern, following my tutorials on how to modify a sleeve block for a shirt, how to draft a sleeve placket and how to draft a sleeve cuff.
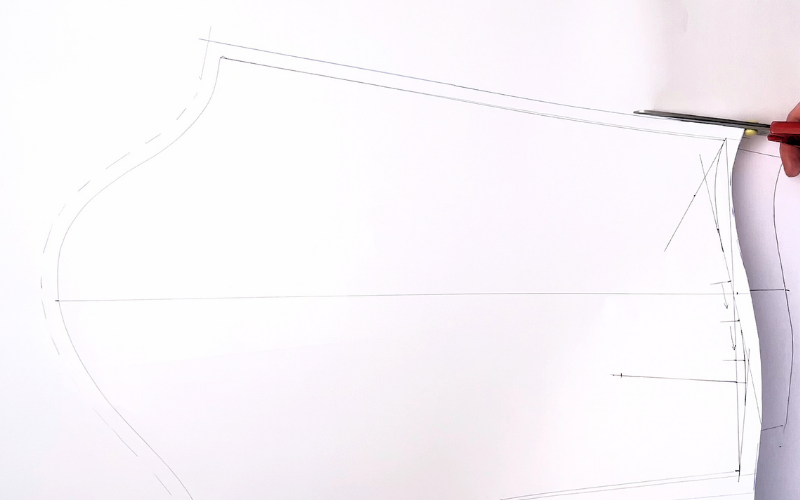
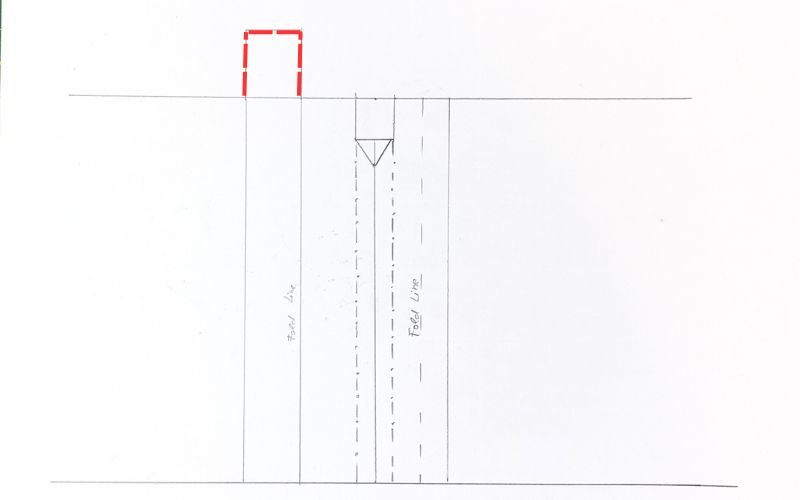
Alternatively, use the basic sleeve block as is, adding an elasticated sleeve opening. Or you can create short sleeve variation with a facing, by tracing the basic sleeve block to the desired sleeve length.
Sleeve choice changes the overall style of the shirt dress dramatically, from structured workwear to relaxed everyday wear.
Step 8: Add Seam Allowance and Grainline
You can add seam allowances at this stage but as I explained in my detailed guide on how to add seam allowances, I keep my base patterns without seam allowance. Regardless whether you are adding sea allowances or not, add straight grain marking that runs parallel to the shirt dress centre front and centre back. Add a fold line marking for the centre back. At this stage I also cut out diamond shapes at the dart tips and the dart base for easier mark transefer on the fabric. I explain in Step 10 of my basic bodice block modification for a shirt pattern.
Testing the Shirt Pattern Draft Before Cutting Fabric
Even when the shirt pattern is drafted correctly, it is worth testing the draft before cutting into your final fabric. Pattern drafting works best when the pattern is checked in three dimensions rather than only on paper. This testing will allow you to fix any balance, fit and mobility issues before you cut into a more expensive fabric.
A quick test shirt dress can reveal how the dress fits on the body, whether the length of the dress meets your expectations and whether you need to adjust any posture issues.
I have full confidence in my pattern drafting from basic bodice blocks that my test garment is made of a cheaper fabric, creating a fully wearable garment. However, if you are new to pattern drafting, or you are using a commercial sewing pattern as a base, I would highly recommend creating a test toile in a similar weight fabric.
In the test garment, I check whether there is any strain at the hip area when moving or sitting down. If the dress is too tight the buttons may fail and you will be left stapling a dress together at work (that what happened to my colleague).
Common Shirt Dress Drafting Mistakes
These are common shirt dress drafting mistakes that I have encountered in my pattern drafting journey.
- Bust points have sharp points:
- Cause: the bust darts end at the actual bust point
- Fix: move the dart end point 2-3 cm away from the actual bust point
- The side seams are not equal length
- Cause: the side seam on the back pattern piece is shorter
- Fix: Walk or measure the front and back side seams to align the length of the side seams. Reposition the hemline on the back pattern.
- There is not enough fabric to fold the bust dart accurately:
- Cause: The correct allowance have not been added to the base of the dart
- Fix: Extend the seams on the either side of the dart beyond the middle point. Connect dart sides with the highest point on the extended lines in the centre of the dart base.
- Buttons pulling at the bust or hips
- Cause: Insufficient ease added at the bust / hip line.
- Fix: Increase a wearing ease at the problem area.
- Shirt dress twists after sewing
- Cause: Incorrect grainline placement
- Fix: Mark the grainline parole to the centre front and centre back lines
- Collar does not match the neckline
- Cause: Neckline seam allowance included in measurements
- Fix: Measure the stitching line, not the cutting line
FAQ: Drafting a Shirt Dress Pattern
Conclusion
Learning how to draft a shirt dress pattern gives you far more flexibility than relying only on commercial sewing patterns. Once you understand how to extend a bodice block into a dress, add shaping through the hips and draft the collar and sleeves, you can create endless shirt dress variations that fit your body and personal style perfectly.
The biggest advantage of pattern drafting is the ability to adjust every part of the garment, from the amount of ease to the sleeve style, collar shape and overall silhouette. Even small modifications can completely change the final look of the shirt dress.
If this is your first time drafting a shirt dress sewing pattern, focus on accuracy rather than speed. Taking time to walk seams, test the pattern and check measurements carefully will make the sewing process significantly easier later.
Once you master the basic shirt dress block, you can use the same foundation to create fitted shirt dresses, oversized shirt dresses, tiered styles, shirt maxi dresses and two-piece shirt dress variations.
About the Author: Pattern Drafting & Garment Sewing

I’ve been sewing for over 30 years and drafting my own patterns for more than a decade. I work almost exclusively with self-drafted patterns, which means I don’t rely on instructions—I rely on understanding how garments fit and come together.
Most of my methods come from figuring things out through testing, adjusting, and breaking down common problem areas using logic and geometry rather than guesswork.
On this site, I share step-by-step tutorials on pattern drafting, garment construction, and sewing techniques to help you create well-fitted, professional-looking clothes from scratch.
👉 Read more about my approach to pattern drafting and sewing here: About Me