In this blog post I will show you how to draft a short sleeve pattern, highlighting some options for sleeve hem finish.
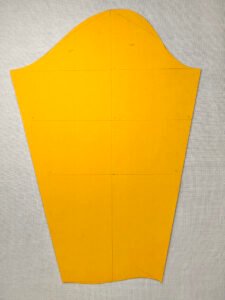
A short sleeve pattern is one of the most useful sleeve variations you can add to your pattern library because it works across dresses, blouses, shirts and casual tops. In warm weather you are already stripped down while in a cooler climate it is as easy to layer up. It is also surprisingly easy to draft from a basic block or any commercial long sleeve sewing pattern, creating the length that meets your ideal short sleeve dimension. Another benefit is that short sleeves use less fabric; that’s always a bonus in a tight economy! I am using the basic sleeve block in this tutorial as all my short sleeve patterns start from this block. You can follow my sleeve block tutorial to create the base pattern for this blog post or you can use any commercial sewing pattern that includes long sleeves that fit you well already. If you are using a commercial pattern, remove any seam allowance for a more precise sleeve pattern.
I prefer drafting the short sleeve pattern from the sleeve block instead of modifying an existing pattern because then I do not have to worry about the fit. The basic sleeve block is created specifically to my custom measurements and I know that it fits perfectly. An existing or commercial pattern may have some modification included that I may have forgotten or am unsure off, leading to a disappointing results later on.
Learning how to draft a short sleeve pattern allows you to transform almost any long sleeve sewing pattern into a short sleeve design. This pattern drafting method works for sleeve blocks and commercial sewing patterns, making it suitable to a beginner as well as someone with a more extensive experience in pattern drafting.
What This Tutorial Will Teach You
This tutorial shows the exact drafting method I use when I make a short sleeve pattern from basic sleeve block. The same approach works whether you are drafting the pattern, modifying a commercial pattern, or adjusting a fit on an existing garment.
Process Overview for Short Sleeve Pattern
To draft a short sleeve pattern, you will trace the sleeve block, adjust the sleeve opening width, refine the sleeve hem curve and prepare the pattern for sewing. The process for short sleeve pattern drafting follows these main steps:
- Tracing the basic sleeve block
- Adjusting sleeve opening width
- Adjusting sleeve opening curve
- Adding seam allowances (optional)
Tools and Materials You Need to Draft a Short Sleeve Pattern
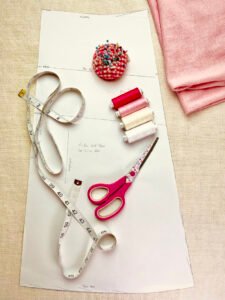
To draft a short sleeve pattern accurately you only need a few basic pattern drafting tools. You can read more about each tool in my post on the essential pattern drafting tools.
- pattern paper
- grading ruler
- long ruler
- protractor
- pen or pencil
- French curve
- pencil eraser
- sleeve block pattern
Having accurate body measurements is one of the most important parts of successful pattern drafting because even small inaccuracies affect the final fit of the shirt dress. If you are unsure about your measurements, follow my guide on how to take accurate body measurements before drafting your sleeve pattern. If you are starting with a commercial sewing pattern, choose a sleeve that already fits well through the armhole and sleeve cap. This drafting method modifies the sleeve length and hem shape while preserving the original sleeve fit.
How to Draft a Short Sleeve Pattern Step by Step
Step 1: Trace the Sleeve Block
If you followed my sleeve block drafting tutorial, you will recall that I marked the locations of the bicep and elbow lines. These lines will are super helpful now because you ca easily decide the location of the short sleeve hem by positioning it in relation to bicep and elbow. However, if you are using a commercial pattern, you will need to mark the measurement of the desired sleeve length from the sleeve crown.
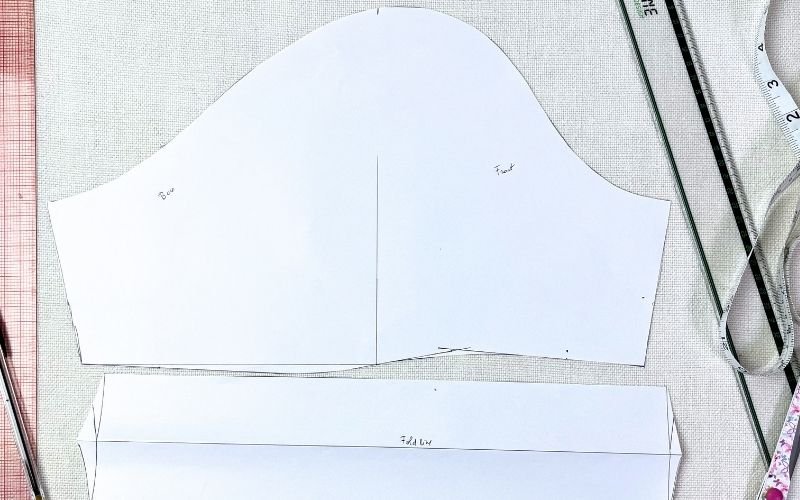
I am drafting my short sleeve to be exactly on the middle bicep. So, I trace the pattern from one side seam to the other at the bicep line but you need to trace it from your chosen sleeve hem line.
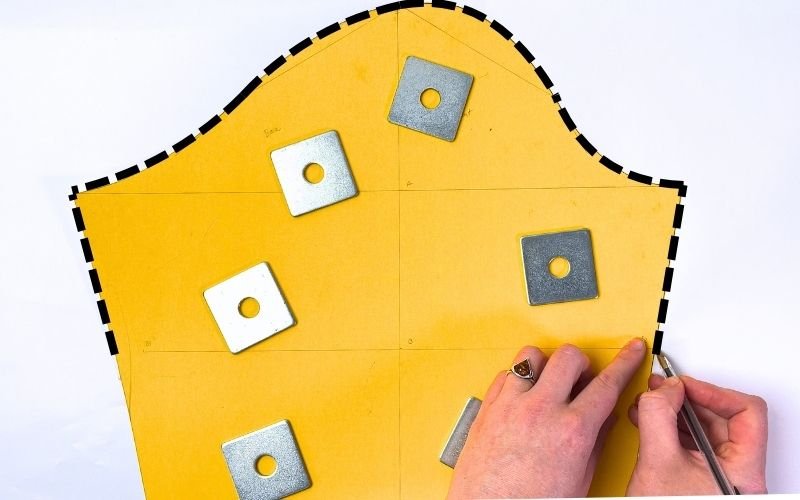
Mark the sleeve cap shoulder notch. If you used a different sleeve length or used a commercial sleeve pattern, also mark the sleeve’s centre line on the wrist. This will be the sleeve’s balance line.
Then connect both sides with a straight line, ensuring that both lines create a square on the sleeve’s balance line.
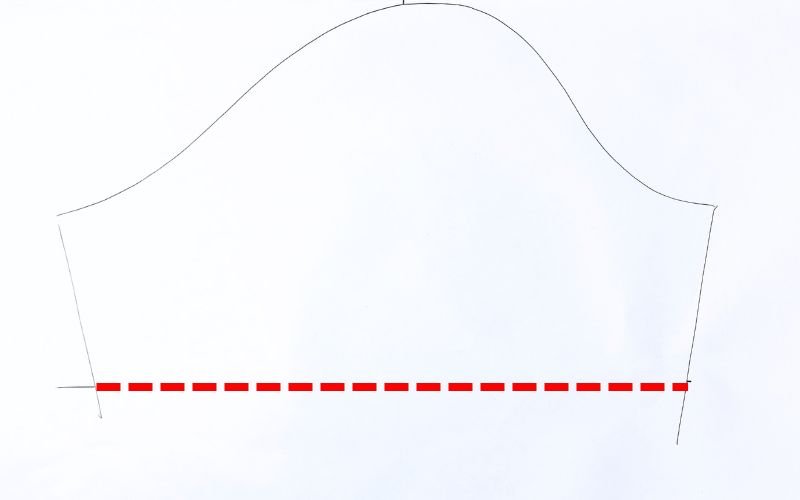
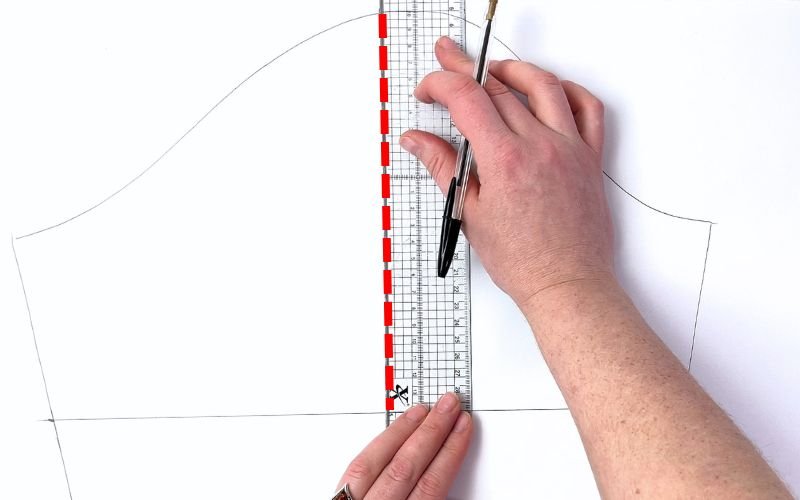
If the lines do not create a straight angle in the centre, that means that one of your sleeve sides seams are low than the other. To correct it, choose one of the side and extend the line from that side to the other, creating aa 90 deeegree angle at the centre balance line.
Step 2: Adjust Sleeve Opening Width for a Closer Fit
With the base short sleeve pattern traced, you now need to adjust the sleeve opening. This step determines how fitted or relaxed the finished short sleeve will look. A narrower sleeve opening creates a more tailored appearance, while a wider opening creates a casual, loose-fitting sleeve.
I find 2 cm ease gives a close fit appearance without being too loose, leaving enough ease for a stiffer fabric or bulkier hem finish. Meanwhile anything over 2.5cm (1″) leans into a relaxed garment. For a visual comparison what a 2cm ease look like, pinch a fabric on the sleeve with your index and thumb. A 2 cm ease is roughly the same size as fabric held between the tips of your fingers.
In the basic sleeve block blog post I showed you how to mark the exact width for the bicep and elbow lines to correspond with your body measurements. Most likely your basic sleeve block was wider than actual body measurements. While on a long sleeve basic pattern the extra width does not cause any issues, on a short sleeve pattern the extra ease might look too baggy, especially if you pair it with a close fitting bodice block.
To reduce the extra ease, you can move the side seams inwards at the sleeve hem by the required measurement, leaving at least 2 cm ease for a comfortable fit.
It is best to move the side seam inwards by creating a curved line as opposed to a straight line, as that will retain the straight angles at the armpit connection points, and you will not need to redraw them.
Step 3: Adjust Sleeve Opening Curve for a Better Fit
If you brought both side seams together, you will note that the side seams create a very sharp V-shaped transition You need to smooth it out. You can either use the method that I listed in the basic sleeve block pattern, using a protractor to create a perfectly smooth 180 transitions (a straight line transition at the connection point) . Or, alternatively, create a 90 degree angle on both sides. On a basic long sleeve block the 90 degree angle adjustment does not work as its angles are too obtuse (aka too wide) and would create a shorter sleeve on the outside. But on a short sleeve the angles are closer to the 90 degrees.
I went with the classic adjustment that creates a S shaped hem, creating 10 / 170 degree angle slant at the centre balance line and a 85/95 degree angles on the side seams (the narrower angle at the front side seam). I show you how to create S shape in how to modify sleeve block for a shirt sleeve pattern.
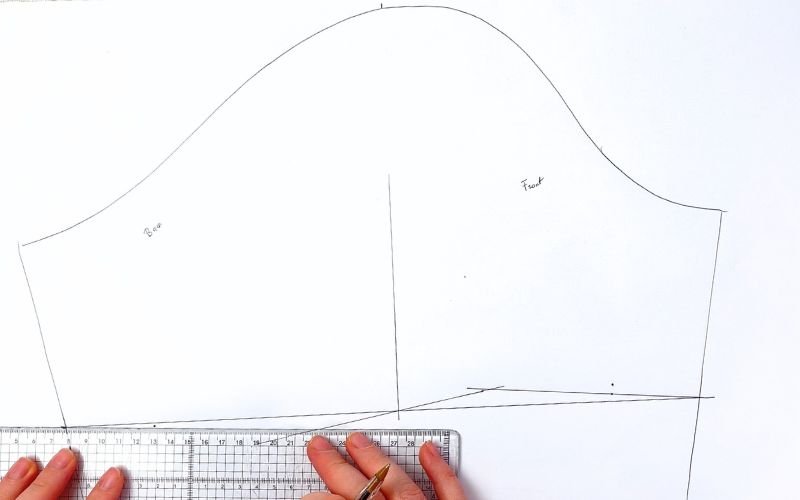
For a 90 degree angle, draw the square lines from the side seams and connect them with a C curve using a French curve.
I prefer the S curve method as that ensures that the sleeve sits nicely around my arm, without flaring outwards.
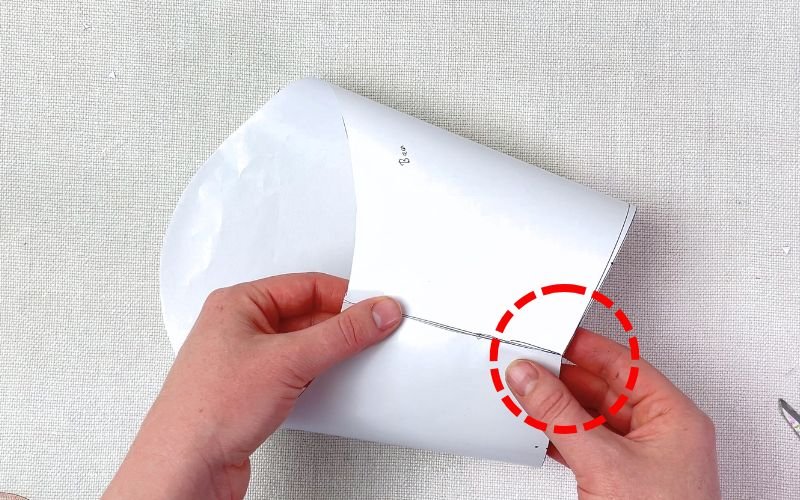
If you are pairing this with a grown on double fold facing by extending the sleeve length, then this step is not necessary. However, for a seperate facing and basic turned up sleeve hem you want to adjust the opening curve for a better fit.
Step 4: Add Seam Allowances and Pattern Markings
Once you are happy with the pattern, you can add the seam allowance before cutting the pattern. I do not add seam allowance to my sewing patterns to allow me to reuse the same pattern for different fabric types and seam finishes. However, my guide on how to add seam allowances goes into detail on how to add them regardless whether you are doing so at the pattern drawing or fabric cutting stage.
Additionally, make a notch for a shoulder point and notches to differentiate the back and front pattern so you don’t not sew them on back to front. For this, the back patterns typically have a double notch for the back and a single note for the front.
Mark a straight grainline that runs parallel to the sleeve balance line. The straight grainline will help you remember which direction the patter should lay on the fabric.
Sleeve Hem Finishes on Short Sleeves
Choosing the right sleeve hem finish can completely change the appearance of your short sleeve pattern. Some finishes create a casual everyday look, while others produce a more structured or decorative result. While the basic short sleeve looks fine with a double fold or narrow hem, you have more than one option.
- Basic double fold hem or narrow hem – perfect for a quick, uncomplicated finish on most fabrics. Add up to 3 cm hem allowance. The side seam of the hem allowance should mirror the side seam angle for a double fold hem.
- A simple rectangle sleeve cuff – this option adds some interest and design, turning the sleeve into more classic and formal look. It works on fabrics with some structure, such as shirting, cotton or linen. I cover the basic constriction in my sleeve cuff tutorial.
- Bias binding facing – another quick finish that works on most fabrics, especially on heavier fabrics. Depending on the weather you are using a single fold or double fold bias tape, you can add some visible contrast colour to the sleeve hem.
- Rolled-up sleeve hem – this method add a more casual look and looks especially fantastic on a shirt dress. I will have a separate blog post on how to draft a facing for a rolled-up sleeve hem.
- Elasticated sleeve hem – works great on lightweight fabrics, such as cotton poplin, lightweight linen or rayon fabric. I find that this option adds a more romantic look to a blouse or a dress.
I personally use the basic double fold hem or a simple rectangle sleeve cuff more often as they are the most straightforward to use and gives a more formal appearance.
Common Mistakes When Drafting Short Sleeve Pattern
These are common mistakes that I have experience myself when drafting a short sleeve patterns. The suggested fix will help you achieve that perfect short sleeve that you want to use for your sewing project.
- The short sleeve does not hung flush against the arm, instead the hem flares outwards away from the body
- Cause: the sleeve hem drafted as a straight line or a C curve on a wider fitting sleeve.
- Fix: adjust the sleeve hem into a S shaped curve as explained in Step 3.
- The hem is too narrow for the sleeve opening
- Cause: the double fold hem allowance was aded as a continuation of the sleeve side seams.
- Fix: fold the paper pattern up along the sleeve hemline before cutting the side seams when adding seam allowance eon a paper pattern. If you add the seam allowance at the fabric cutting stage, draft the hem allowance with a mirrored sleeve side seam angle.
- The sleeve feels tight around the upper arm
- Cause: Too much width was removed when narrowing the sleeve opening.
- Fix: Measure your upper arm circumference and ensure the finished sleeve retains at least 2 cm of wearing ease.
When to Use a Short Sleeve Pattern
A short sleeve pattern works well for:
- Shirt dresses
- Button-up shirts
- Casual blouses
- Summer dresses
- Workwear tops
- Children’s clothing
Because short sleeves use less fabric and are quick to sew, they are often one of the first sleeve variations many dressmakers learn to draft.
FAQ: Drafting Short Sleeve Pattern
Conclusion
Drafting a short sleeve pattern is one of the easiest ways to expand your sewing pattern collection without creating an entirely new sleeve from scratch. Starting with a sleeve block or a well-fitting commercial sewing pattern allows you to customise the sleeve length, adjust the sleeve opening and choose a hem finish that suits your garment design.
Whether you are making a shirt dress, blouse, summer dress or casual top, understanding how to draft a short sleeve pattern gives you greater control over fit and style. Once you are comfortable with this basic sleeve modification, you can use the same principles to create countless sleeve variations for future sewing projects.
About the Author: Pattern Drafting & Garment Sewing

I’ve been sewing for over 30 years and drafting my own patterns for more than a decade. I work almost exclusively with self-drafted patterns, which means I don’t rely on instructions—I rely on understanding how garments fit and come together.
Most of my methods come from figuring things out through testing, adjusting, and breaking down common problem areas using logic and geometry rather than guesswork.
On this site, I share step-by-step tutorials on pattern drafting, garment construction, and sewing techniques to help you create well-fitted, professional-looking clothes from scratch.
👉 Read more about my approach to pattern drafting and sewing here: About Me