When I first started out sewing, I did not care how to finish raw edges . I just wanted to jump straight into a finished garment and the extra step of creating a neat looking garment interior was of no consequence. However, as I mastered sewing it became apparent, that to enjoy the finished garment, I need to make it look neat from the inside.
The neat raw edges is not just an appearance or comfort thing, it also helps the garment last for a lot longer, reducing fraying and disappearing seam allowances.
So, with all that in mind, let’s look at what options you have to finish the raw edges of fabric.
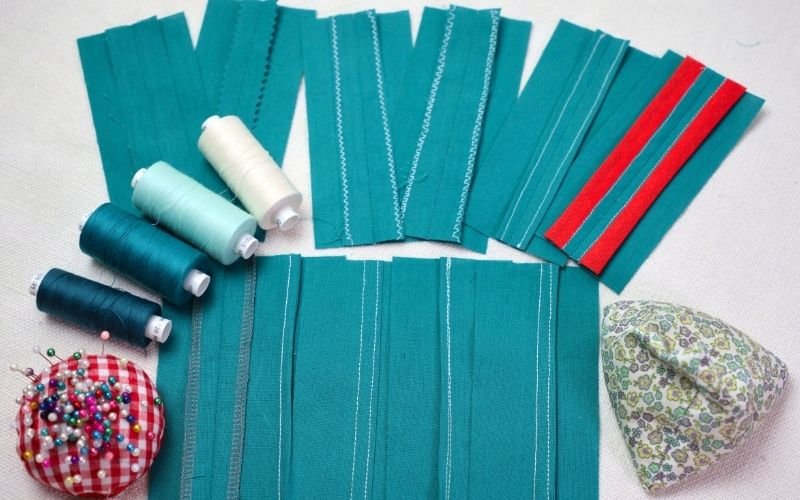
Quick Overview of Main Types of Seam Finishes
Before I jump into each seam finish, here is a summary table of the options available.
| Seam Finish | Required Seam Allowance | Speed & Complexity | Best Used For | Quick Takeaway / Avoid If |
| Plain Seam | Varies by fabric (1 cm – 1.5cm) | Fast & Very Simple | Lined garments, non-fraying fabrics (leather, jersey, wool) | Avoid if the garment is unlined and fabric frays easily. |
| Pinked Seams | Varies by fabric (1 cm – 1.5cm) | Fast & Very Simple | Stable, dense fabrics; reducing bulk on curved seams | Avoid on open-weave fabrics like muslin; not for visible finishes. |
| Zigzag Seam Finish | Standard (1.5cm straight, 1 cm curves) | Slower & Simple | General raw edge security when you don’t have an overlocker | Avoid on very lightweight fabrics to prevent tunneling. |
| Overedge Stitch | Standard (1.5cm straight, 1 cm curves) | Slower & Simple | Stronger alternative to zigzag; prevents tunneling | Avoid if the fabric is too light and stitches cast shadows/indentations. |
| Overlock Seam Finish | At least 7mm (wider than overlock chain) | Fastest & Simple (once learned) | Majority of projects; excellent for jerseys and everyday wear | Avoid on delicate, sheer fabrics like silk or rayon. |
| Clean Finish Edge | 1.5 cm | Fast (for complex types) & Beginner-friendly | Hiding raw edges on unlined garments | Avoid on thick fabrics or deep curves (necklines/armholes). |
| Hong Kong Finish | Standard 1.5 cm (depends on bias tape width) | Slower & Moderately Complex | Unlined jackets and thick fabrics (like wool) | Avoid on lightweight fabrics; adds too much bulk and stiffness. |
| French Seam Finish | Wider allowance (approx 1.2 cm to 1.5 cm total) | Slow & Complex on curves | Lightweight, sheer fabrics (silk, rayon, tulle) | Avoid on thick fabrics. Tests your nerves but looks beautiful. |
| Mock French Seam | Standard 1.5 cm (1cm is harder) | Slow & Easier than true French seams | Lightweight fabrics when you forgot to plan ahead | Avoid on deep curves; produces wider, stiffer seams. |
| Self Bound Seam | Standard 1.5 cm | Slow & Complex (requires precision) | Lightweight garments, curves, and durable kids’ clothes | Avoid on thick fabrics to prevent excessive bulk. |
| Run and Fell Seams | Standard 1.5 cm | Slow & Complex (requires planning) | Heavy, dense fabrics like denim; adds immense strength | Avoid if you don’t want visible double topstitching. |
Build Your Own Sewing Stitch Reference Book
Learning sewing stitches is much easier when you can see real examples in front of you. That’s exactly how I learned, and it’s why I’ve recreated my own stitch reference book for you.
Subscribe below to download my free Sewing Stitch Sample & Reference Book. You’ll get printable pages where you can attach your own stitch samples, record your machine settings, and build a handy reference guide you’ll use for years to come.
How to Finish Raw Edges of Fabric
I will cover each type of edge finish, starting with simple and gradually progressing to more complex ones, highlighting their uses and my personal verdict.
Plain Seam
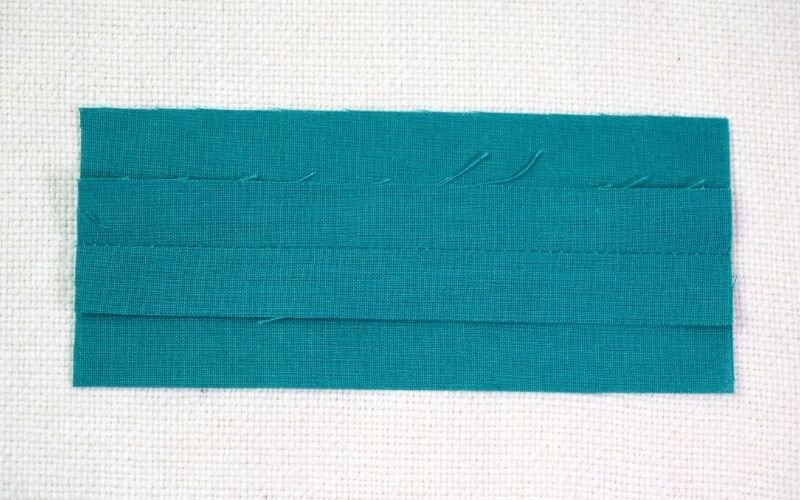
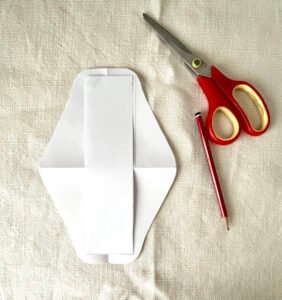
Plain seam is just that – a plain seam using any of the basic construction stitching without any raw edge finish. This can be used on any fabric that does not fray or if you are adding a lining or if the seam will be hidden within the construction like in this reusable sanitary pad tutorial. The fabrics that do not need any raw edge treatment include most natural fibre jerseys, such as cotton or bamboo jersey, a leather, wool and some synthetic fabrics.
Required seam allowance
Depends on a fabric. A open weave on straight edges will need 1.5 cm (5/8″) as minimum while a closer weave or curved seams will require 1 cm (3/8″). I cover the required seam width in my seam allowance blog post.
Speed of sewing
Fast. You do not need to make any additional steps.
Complexity
Very simple.
Used for
Fabrics that do not fray, such as boiled of felted wool or leather and leatherette, jersey, or decorative creations that will not be under a lot of wear or washing stress. It is also used when the garment is fully lined, hiding raw edges.
Avoid if
The garment is not lined and the raw edges fray readily.
My verdict
This was a seam finish that I used for years as beginner seamstress. However, as my appreciation for longer lasting garments and neat interior increased, I only use this seam finish for lined garments or on cotton and viscose jersey.
Pinked Seams
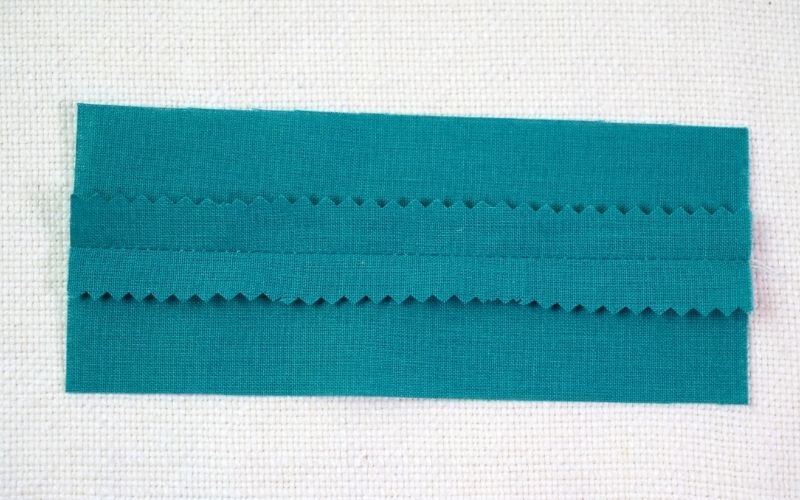
Pinked seams are an easy and quick finish, using pinking shears to neaten the raw edges. This edge finish is used on fabrics that are somewhat stable and dense. It would not be suitable for an open weave, such as muslin, as the fabric would continue to fray in repeat laundry cycle.
Required seam allowance
Depends on a fabric. A open weave on straight edges will need 1.5 cm (5/8″) as minimum while a closer weave or curved seams will require 1 cm (3/8″).
Speed of sewing
Fast.
Complexity
Very simple.
Used for
Quick solution for neat raw edges on stable denser fabrics, or where other seam finishes would not work.
Avoid if
The raw edges fray readily.
My verdict
This is a quick seam finish but I only tend to use to reduce seam allowance on curved seams, such as neckline and armholes on garments that have facings or lining. I would not use it for projects where seam finish is visible.
Zigzag Seam Finish
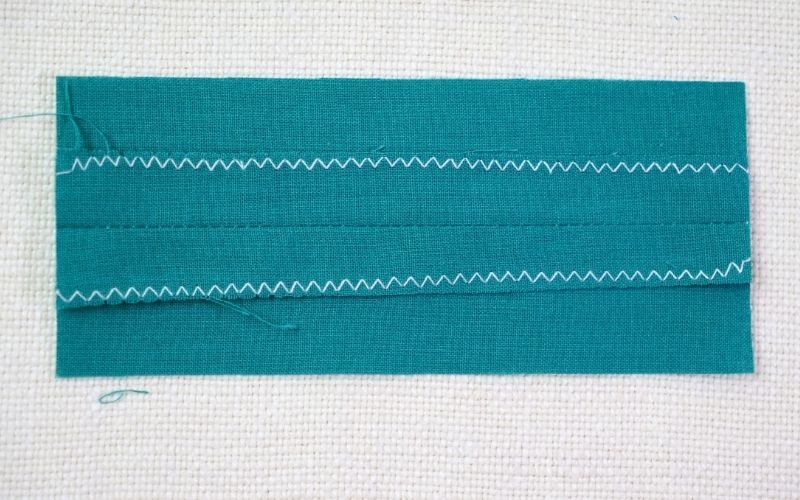
Zigzag seam finish stabilises the raw edge more than a pinked seams as the addition of sewing adds extra structure and secures the threads on a fabric. When sewing, you can either sewn close to the edge, with the needle going just past the edge of the fabric, to catch the loose threads or close to the edge. With the latter you have an option either to cut the fabric close to the stitching line or leave it to unravel closer to the stitch line by itself. It is a great solution if you do not have an overlocker or your sewing machine does not have an overedge stitch.
Required seam allowance
You can keep the standard seam allowance of 1.5 cm (5/8″) on most straight edges, and use the reduced 1cm (3/8″) seams allowance on curved edges.
Speed of sewing
Slower as the needle makes additional step to create a zig zag.
Complexity
Simple.
Used for
Securing raw edges where there is no access to overlocker. Suitable for most projects
Avoid if
The fabric is very light and you cannot adjust the width of the zig zag stitch to avoid tunneling.
My verdict
I used this finish a lot before I got an overlocker. I liked that I can sew it without changing the basic sewing machine foot. However, I was disappointed that the sewing is slower and that edges would still fray a little, until it hits the secured fabric, leaving loose threads hanging off the edge.
Overedge Stitch Seam Finishing
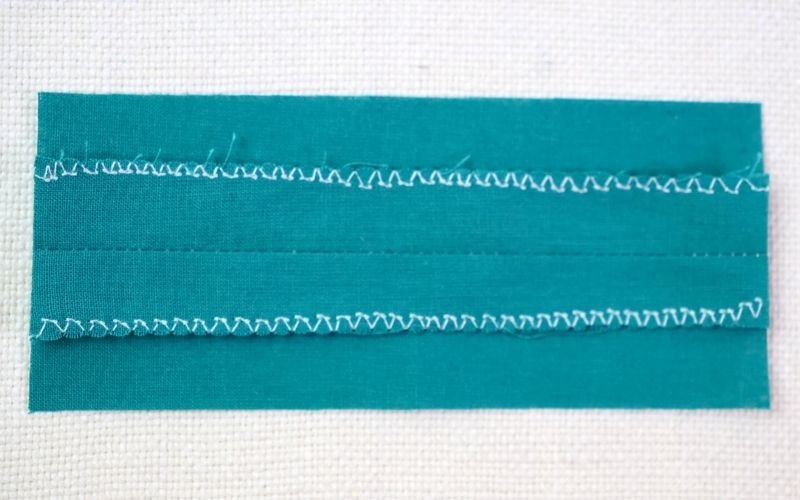
Overage stitch is available on most beginner level sewing machines. It usually requires a specialist foot to be used but I am successfully using just the basic foot. Because I am too lazy to take four steps to my sewing box to hunt for the overedge stitch foot.
You sew the overedge stitch close to the raw edge, with needle going just over the fabric edge. However, similarly to zigzag stitch, you can sew further off the edge and later trim it. The benefit of overedge foot is that the stitching does not usually create a tunnelling. The downside is that the sticking feels a little denser and might show indentation through to the right side on light garments.
Required seam allowance
You can keep the standard seam allowance of 1.5 cm (5/8″) on most straight edges, and use the reduced 1cm (3/8″) seams allowance on curved edges.
Speed of sewing
Similar speed to zig zag stitch.
Complexity
Simple.
Used for
Securing raw edges where there is no access to overlocker and you want to use a stronger stitch than zig zag, avoiding tunnelling. Suitable for most projects
Avoid if
The fabric is very light and stitch is casting shadows on the right side.
My verdict
I do not use this seam finish often. If I had no access too overlocker and needed quick simple finish, I would choose zig zag stitch instead.
Overlock Seam Finish
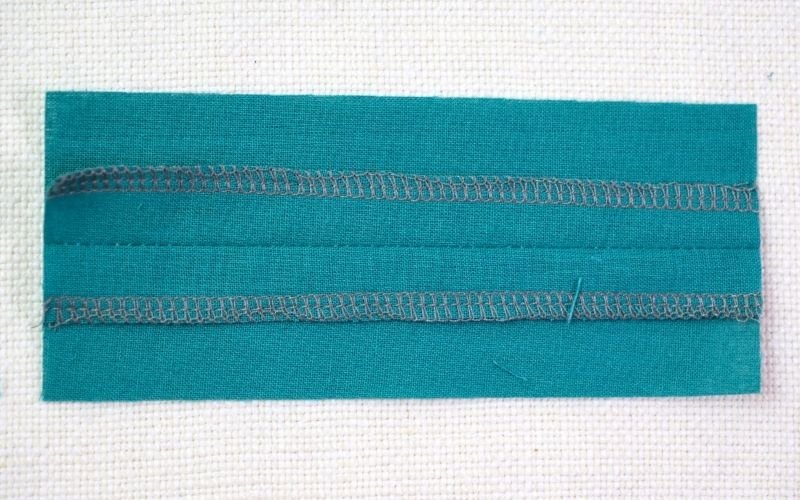
Overlock finish is the quickest finish that you can have only beaten by plain seam without any additional sewing. This requires an overlocker but once you have acquired it, you will not want to go back to zig zag or overedge finish even with all the additional machine set up time.
Typically, you only need a three threads for overlock seam finish – upper and lower looper and left needle. In my basic sewing stitch post I discuss the removal on either left or right needle, but for the raw edge neatening I would recommend removing right needle, to create deeper edge cover. This is especially helpful on trickier looser weave fabrics.
As I sew a lot of jersey garments for my children and myself (such as this T-shirt Project), I keep all four threads to reduce the switching time.
Required seam allowance
The overlocker will sew around 7mm (5/16″) chain so your seam needs to be at least a few mm wider to avoid accidentally cutting the garment.
Speed of sewing
Fastest option after plain seam.
Complexity
Simple once you learn how to use overlocker.
Used for
Suitable for majority of projects where you do not need extra durability given by more complex seam finishes such as French seam or run and fell seam.
Avoid if
The fabric is very light to avoid showing on the other side. Or you cannot get a tension right.
My verdict
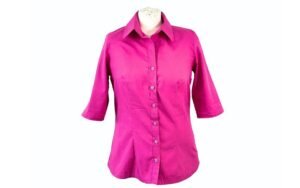
This my absolute favourite seam finish and I use it on all projects, unless I am using delicate silk or rayon fabrics. While the example above shows two sides of the seam being fished, I actually sew both seam allowances together for even quicker raw edge treatment, like I did on my shirt sewing project. If you are following my example, make sure that you press the seams open first before using the overlocker to retain that professional finish.
The above seam finishes are quite simple and show the raw edges even when they are neatened. Next, I will show you more complex seam finishes that hide the raw edges completely, progressing from easier to more challenging finishes.
Clean Finish Edge Seam
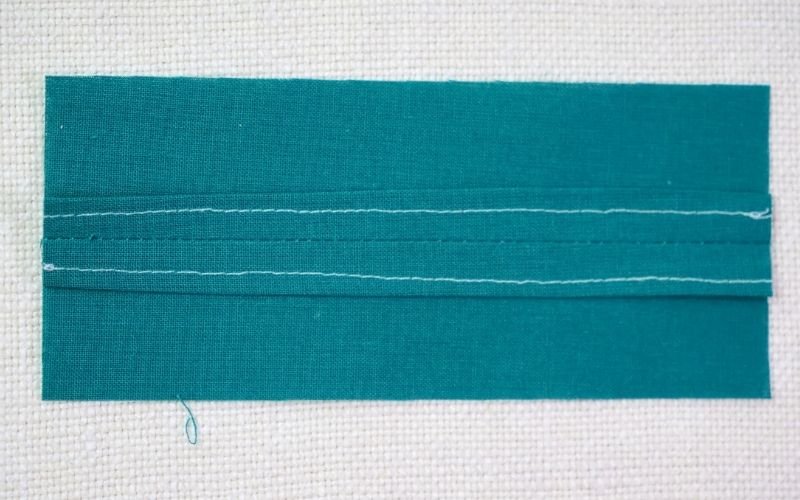
If you do not like any fray threads visible on the inside of an unlined garment or the look of overlocker seams, then the clean finish edge seam may become your favourite seam finish. It hides all the raw edges on the wrong side while remaining easier than some of the methods that I will discuss later on.
To sew, finish the seam the same as plain seam and then press the seam allowance of each side behind itself, before sewing a straight stitch along the seam allowance only.
Required seam allowance
You will need 1.5 cm (5/8″) seam allowance.
Speed of sewing
Fastest option for more complex seam finishes that hide the raw edges completely.
Complexity
More involved than simple finishess above but still completely doable for a beginner..
Used for
Hiding raw edges on the unlined garments. .
Avoid if
The fabric is thick or on curves, such as necklines and armholes. for those use plain seams and facing, bias tape or lining instead.
My verdict
I used this seam finish a lot as I progressed with my sewing skills. However, I do not use it anymore for garment sewing these days, either opting for overlocker finish, Hong Kong or French seams instead.
Hong Kong Finish Seam
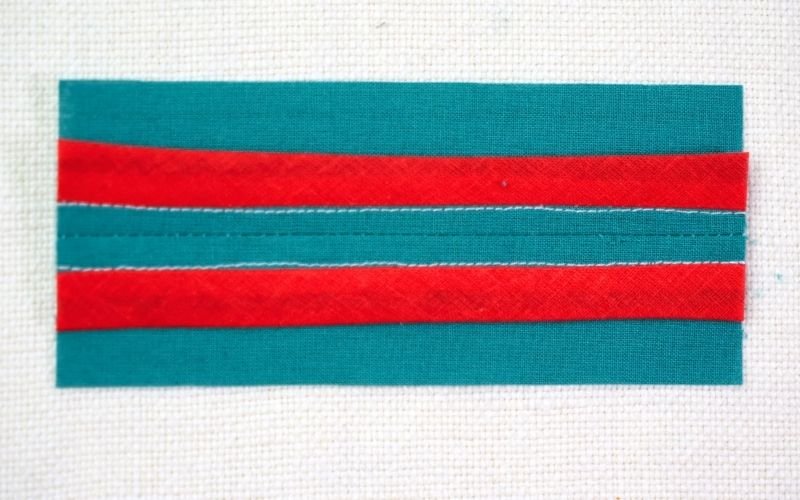
The Hong Kong seam finish is the I reach for when sewing unlined jackets. For this method, the raw edges are finished with a double fold bias tape. You can open up the bias binding and attach one side before folding over and sewing in the ditch or from the wrong side.
Or, if you feel extra brave and trust your sewing skills, you can insert the raw edge I between the folded bias tape and sew with one seam close to the edge. This may lead to missed stitching so you have to be mindful how to close to the edge you are sewing. On a flip side, you would lave a “pocket” that could curl up if sewn too far away from the edge, but this is a quicker solution for when it does not bother you and you just want the project to be finished.
Adding a colourful bias tape you can spruce up the interior of the garment without adding extra layers in a way of a lining.
Required seam allowance
A standard seam allowance of 1.5cm (5/8″) is more appropriate but it would depend on the width of the double fold bias tape. A wider tape would require more seam allowance while a narrow would suit even a reduced seam allowance.
Speed of sewing
Slower, especially if you are atatching each bias tape side separately.
Complexity
More complex but still easy to get your had around without causing major headaches.
Used for
Unlined garments, especially those using thicker fabric. specially suited for thick fabrics, like wool, where you want to hide the raw edge but the fabric itself is too thick to use other complex methods.
Avoid if
You are sewing lightweight fabric as the addition of the bias tape create thick wide seams that may restrict the natural fabric movement.
My verdict
This is an amazing seam finish for lightweight unlined summer jackets, where you do not want to make the garment too warm for the hot summers we seem to be getting these days!
French Seam Finish
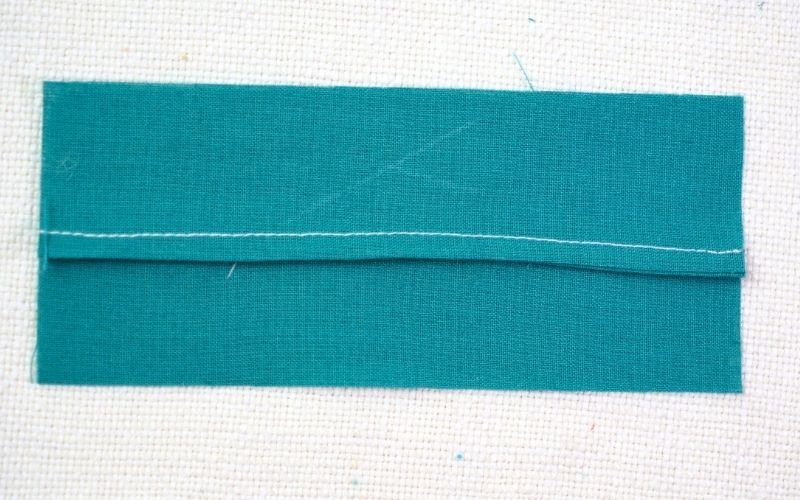
As you are learning how to sew, at some point you will get brave to sew something lightweight, like a silk blouse or light rayon summer dress. These projects will require a French seam. And while the French seam finish may look like a greatest puzzle created for a modern seamstress (especially those armhole and princess seam bodice), it a skill that you need to learn to progress to the next level. This is a seam finish that deserves a blog post on its own, to address all the things that may go wrong and how to avoid them.
A French seam is basically sewn twice. First with wrong sides facing, sew a narrow seam. Then press the seam open and trim the seam allowance to even narrower one (too close and the seam may come undone and hard to turn, too far and your garment will not fit you). Next, turn the piece so that they have right sides facing and sew another narrow seam, catching the previous seam allowance in between it. Then press the seam to one side.
Required seam allowance
The French seam will require a wider seam allowance than the standard you are used to. As a good rule of thumb, the first seam needs to be around 5mm (1/4″), and the next another 5mm (1/4″) with a few mm spare to accommodate fluidity of the fabric and the thicker seam.
Speed of sewing
Slow, you are sewing each seam twice and trimming the seam allowance after first step.
Complexity
Straight seams are largely straightforward, but the curves may raise some challenges.
Used for
Lightweight silk, rayon, cotton, tulle, fabrics that are see through and would benefit from narrow, practically invisible seams. Can be used on muslin but the seams will be quite thick and hard to trim to narrow width without th first stitching unravelling
Avoid if
Sewing with thick fabrics or you struggle with controlling lightweight fabrics. For the former, use run and fell seams while for the latter, practice with sample fabric first.
My verdict
This is my all time favourite finish due to its neat appearance even if sewing the makes me question my sanity or test the nerves of steel.
Mock French Seam Finish
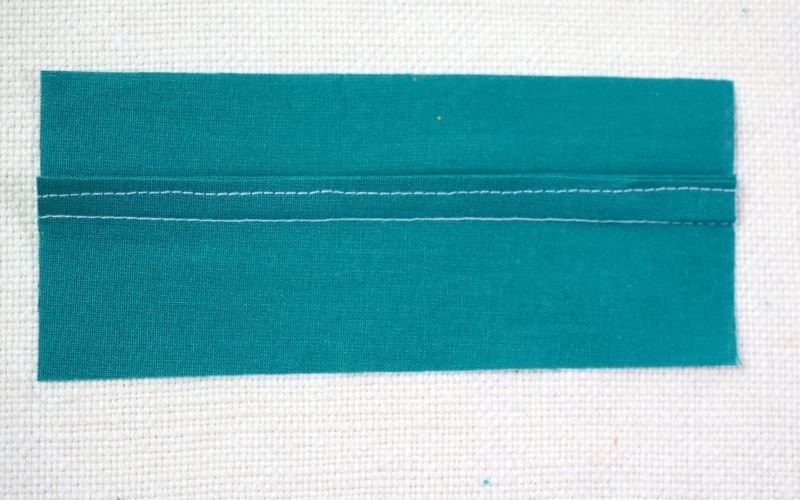
A mock French seam finish is a great alternative to a French seam finish if you do not feel brave to remember to face the fabric pieces the wrong side together first or you completely forget to consider that tricky lightweigth fabrics need a differnt and stronger seam finish.
While mock French seam is a good alternative, it actually produce wider seams than French seam and will cause difficulty on deep curved seams.
To sew a mock French seam, make a plain seam as usual. Then press the seam open, press the seam allowances up, towards the seam line, and then press them together, before sewing them closed.
Required seam allowance
A standard seam allowance of 1.5cm (5/8″) or 1 cm (3/8″). The latter will be harder to sew.
Speed of sewing
Slow.
Complexity
Easier than French curve if there is enough of seam allowance.
Used for
For the projects that call for French curves or if you want to neaten the seams after sewing the seams.
Avoid if
There are a lot of deep curves.
My verdict
While this is an easier to understand than French seams, it actually is not so simple in execution. I don’t use this seam finish these days at all as the wider seam allowance changes how the lightweight fabric behaves and it is not sited on curved seams. Instead, I would use a Self bound seam finish that I am discussing next.
Self Bound Seam Finish
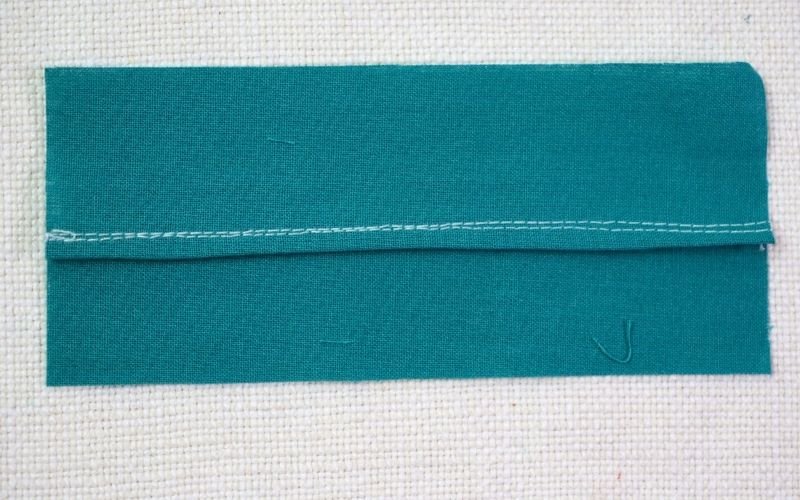
Self Bound seam finish is an excellent alternative to French seams or for seams that require extra durability. This produces narrower seam width than mock French seam and is easier to sew on curves compared to French seam.
To sew a self bound seam finish, make a plain seam. After pressing it open, trim one side to an around 1/3 of it. Press up the other uncut seam allowance by around one third and fold it over the narrower seam allowance. Stitch within the seam allowance, hiding the raw edges.
Required seam allowance
A standard seam allowance of 1.5cm (5/8″). Narrower seam allowance will be harder to control on flimsy fabrics.
Speed of sewing
Slow.
Complexity
Complex as require additional steps and precision.
Used for
On lightweight garments instead of French seams, especially on curves. On children’s clothing or garments that need reinforced seams.
Avoid if
You are using thick fabrics as they would create very thick seams.
My verdict
It is a fun seam finish but can cause issues on tricky fabrics. I have not yet tried it on muslin fabric but, providing that I start with a wider seam allowance and presed the fabric well before sewing, it should work well.
Run And Fell Seams
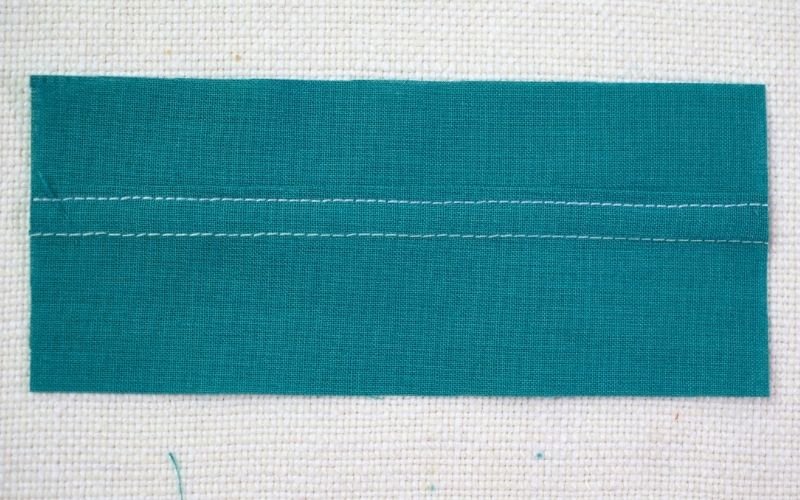
The run and fell seams are the ones that you would see on denim garments. They are fantastic solution for dense fabrics and not only neatens the raw edges while reducing the bulky seams, but it also adds extra strength to the seams.
To sew a run and fell seam, sew a plain seam with wrong sides facing. Then trim one seam allowance to half width. Fold the other seam allowance over the narrower one, pressing in place. Sew close to the fold line, through the main fabric, creating the trademark double seam line on denim.
Required seam allowance
A standard seam allowance of 1.5cm (5/8″). A narrower seam allowance is not suitable for thick fabric.
Speed of sewing
Slow but quicker than Hong Kong finish.
Complexity
Complex when you try if for the first time. You have to be mindful which seam allowance you are trimming to create matching sewing lines where two parts of the agreement meet.
Used for
Denim.
Avoid if
If you do not want the visible double stitch line or you are creating a tube that cannot be sewn flat on a sewing machine such as inside leg of denim jeans.
My verdict
A classic seam finish for denim fabrics that requires a careful planning. It is so easy to overlook which seam allowance you are trimming down on mirrored patterns.
How to Choose the Right Raw Edge Finish
Many of the seam finishes discussed, with the exception of plain seam, can be used on pretty much all of the medium weight fabrics. If you are a beginner seamstress or tailor, I would recommend starting with simple seam finishes and then gradually move up (or down the list) to improve your sewing skills and edge finish repertoire. A medium weight plain weave cottons or linens are a fantastic options on trying out more complex seam neatening options, such as French curves, without the inherent difficulties of more demanding fabric types.
Conclusion
A professionally finished garment needs to look neat and tidy from both sides. Next time you are planning your sewing project, to elevate your garment, assess what fabric you are working with and which of the methods of neatening the seams is more appropriate. This way, you will have a piece of clothing that you will be proud to wearing and it will withstand repeat washing throughout its useful life.
Frequently Asked Questions
About the Author: Pattern Drafting & Garment Sewing

I’ve been sewing for over 30 years and drafting my own patterns for more than a decade. I work almost exclusively with self-drafted patterns, which means I don’t rely on instructions—I rely on understanding how garments fit and come together.
Most of my methods come from figuring things out through testing, adjusting, and breaking down common problem areas using logic and geometry rather than guesswork.
On this site, I share step-by-step tutorials on pattern drafting, garment construction, and sewing techniques to help you create well-fitted, professional-looking clothes from scratch.
👉 Read more about my approach to pattern drafting and sewing here: About Me